Thru-Hiking Gear List
🔥 A campfire gear chat:
Close your eyes, count to 3… open them!
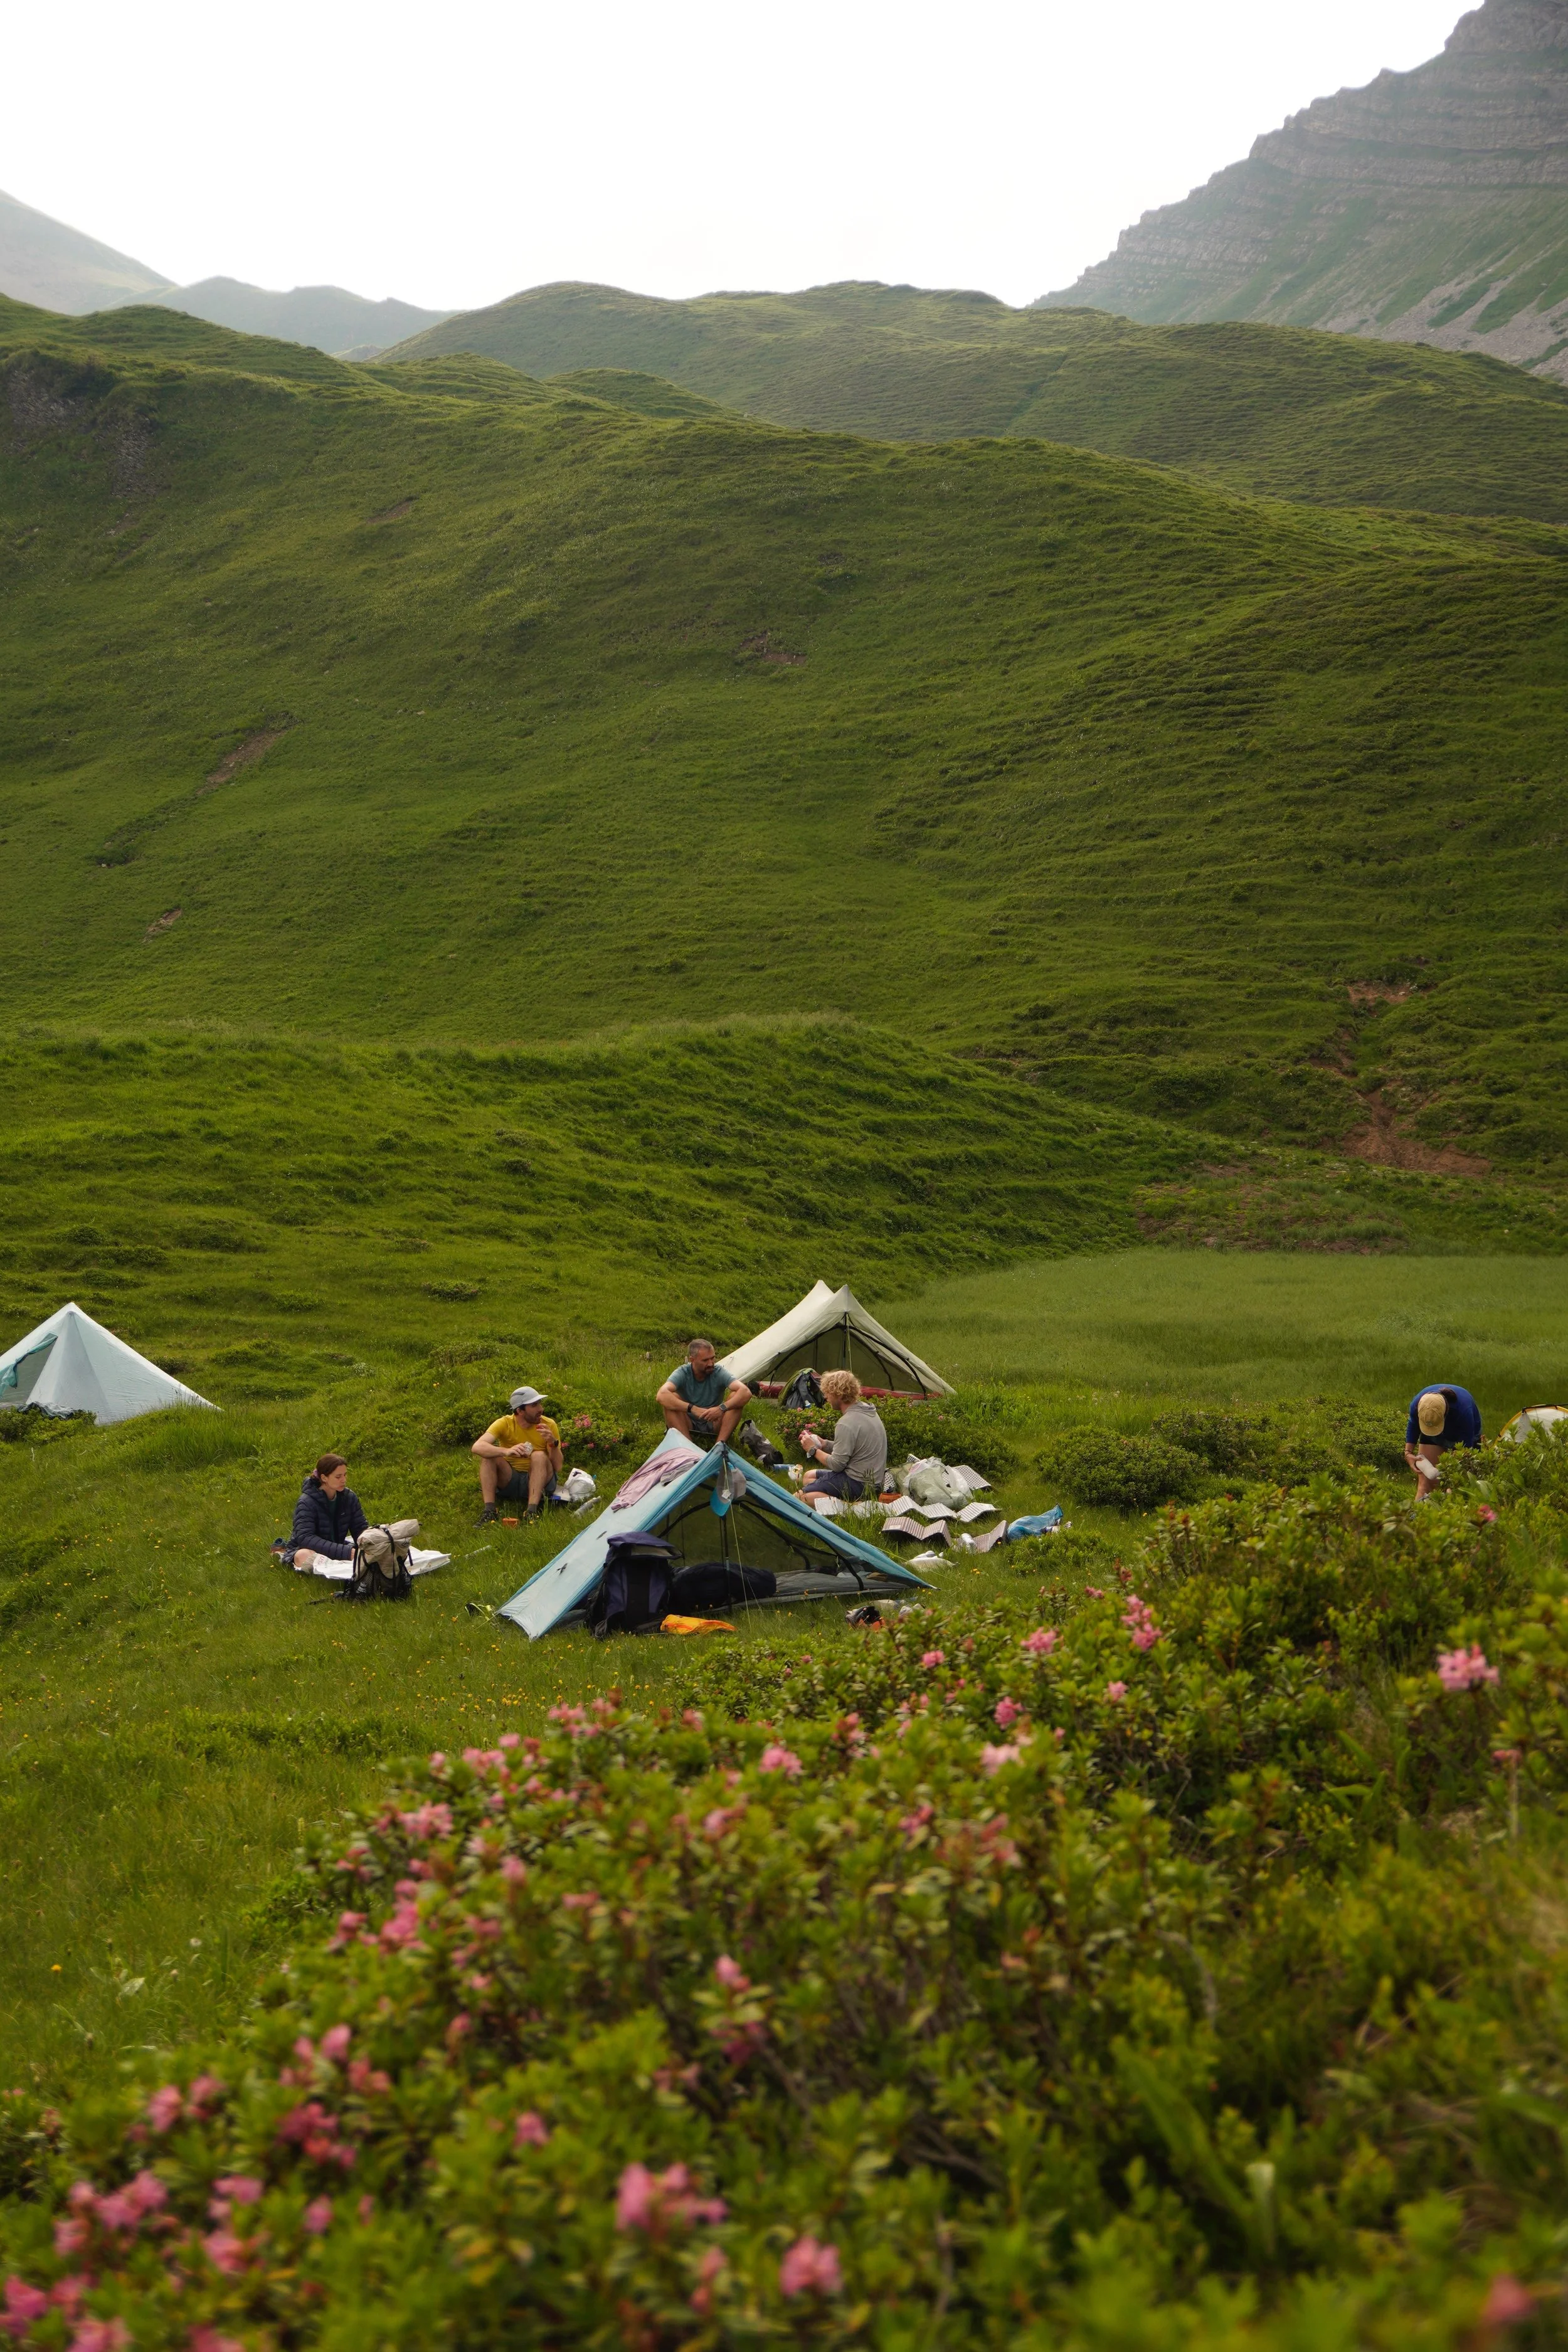
You are sitting around a crackling campfire, your hands holding a warm pot of your favorite ramen noodles. It’s getting dark, and the sounds of the forest surround you… crickets, an owl, the call of an elk… laughter fills the air.
There are other hikers around the fire, all stretching their feet towards the flames, trying to warm them up while enjoying dinner and sharing the memories of a long and strenuous day on trail.
While chitchatting about their food, their lives and dreams, a topic suddenly pops up: ultralight gear. They start sharing their ultimate tricks to further reduce their pack’s base weight.
You are in your happy place.
Vocabulary
For you to understand and participate to the conversation, it’s important to know the vocabulary that hikers use when becoming gear nerds. Let’s dive into it.
Base weight
Weight of the fully packed backpack, excluding worn gear and consumables.
👕 Worn gear:
Everything you wear while hiking (clothes, shoes, fanny pack, hat, sun glasses, …).
🍴Consumables:
Everything that is used up, and eventually re-filled, during your hike (water, food, fuel, sunscreen, wet wipes, tooth paste, …).
Ultralight
Lighter than light, faster than lightspeed.
Jokes aside, ultralight does not only mean “as light as possible”, but also represents a movement, a state of mind, a lifestyle on the trail. It means carrying a backpack which only contains the essential gear for surviving out there.
I have a lot of respect for ultralight hikers. They always look like flying, bouncing around like feathers, and they somehow manage to live multiple months on trail without apparent effort, totally unbothered by their total lack of comfort. The base weight of ultralight hikers is usually less than 4.5 kg. The hardcore ones even manage to reduce it to 3 kg. I know… craaazy!
⚖️ Base weight comparison:
As a comparison, our base weight is approximately 7.5 kg.
Ultralight gear is expensive and keeps evolving and improving, with lighter and more performant materials being developed. Chef and I already spent quite some money to buy good quality and lightweight gear. There is for sure room for improvement, but we’re fine with our base weight and our level of comfort on trail for the moment.
The Big 3
When talking about the “big 3”, we usually mean the three most important, heaviest and probably most expensive backpacking gear pieces: the backpack, the tent, and the sleeping bag.
These items can hugely influence the base weight, and can therefore also easily define if a hiker is embracing the ultralight lifestyle or not.
Luxury items
Items which are not really needed for survival, but rather for improving your personal comfort on trail. Examples could be e-readers, sitting pads, camp shoes and stoves (yep, you can actually ditch the stove and join the “cold soaking movement”).
👑 Perspectives:
Luxury items are usually of great importance for their owner while on trail… they can really make you feel like a king, and can make you smile at the end of a horrible day. However, once back to normal life, they kind of transform into meaningless objects with no particular purpose.

Thru-Hiking Gear List
This is our current thru-hiking gear list, a list that took form over the last few years, while growing our knowledge and experience on various trails.
🐌 Last update: November 2025
We update this list once a year!
🎒 Trail-Specific Gear:
The last category block (“Trail-Specific Gear”) lists all additional items that are trail-dependent and that are not always packed for an adventure. The decision to carry them or not depends on the country, the season, the temperatures, the weather and the terrain. For this reason, they are not included in the base weight.
💥 Hike Your Own Hike:
Use this gear list for inspiration, but don’t take it as the one and only way to go! “Gear” is a very subjective topic, as every hiker is different and therefore has different needs while on trail. We too are still inside an endless learning phase… so find what suits you best and HYOH!
🔗 Affiliate disclosure:
This page may contain affiliate links, which means that we may receive small commissions for purchases made via these links at no additional cost to you. Thank you for supporting Tales of a Trail and for keeping us on the trails!
Additional Notes
Here you’ll find a few notes about the most important gear pieces we own.
Backpack
I have a ULA Circuit from ULA Equipment, and personally think it is the best backpack out there when comparing weight, volume, pockets size, load carrying capability, back support, comfort and durability. I can’t recommend it enough.
🎒 How to describe it:
Comfortable, strong, durable, spacious, beautiful, simply perfect. Just so you get an idea… it’s been my pack on numerous trails, including the PCT, and it doesn’t have a single scratch.
You know the scene in Star Wars (Empire Strikes Back), when Yoda is strapped to Luke’s back during training? Well, this backpack is exactly like Yoda… effortlessly there, following your every movement on trail, a very loyal companion.

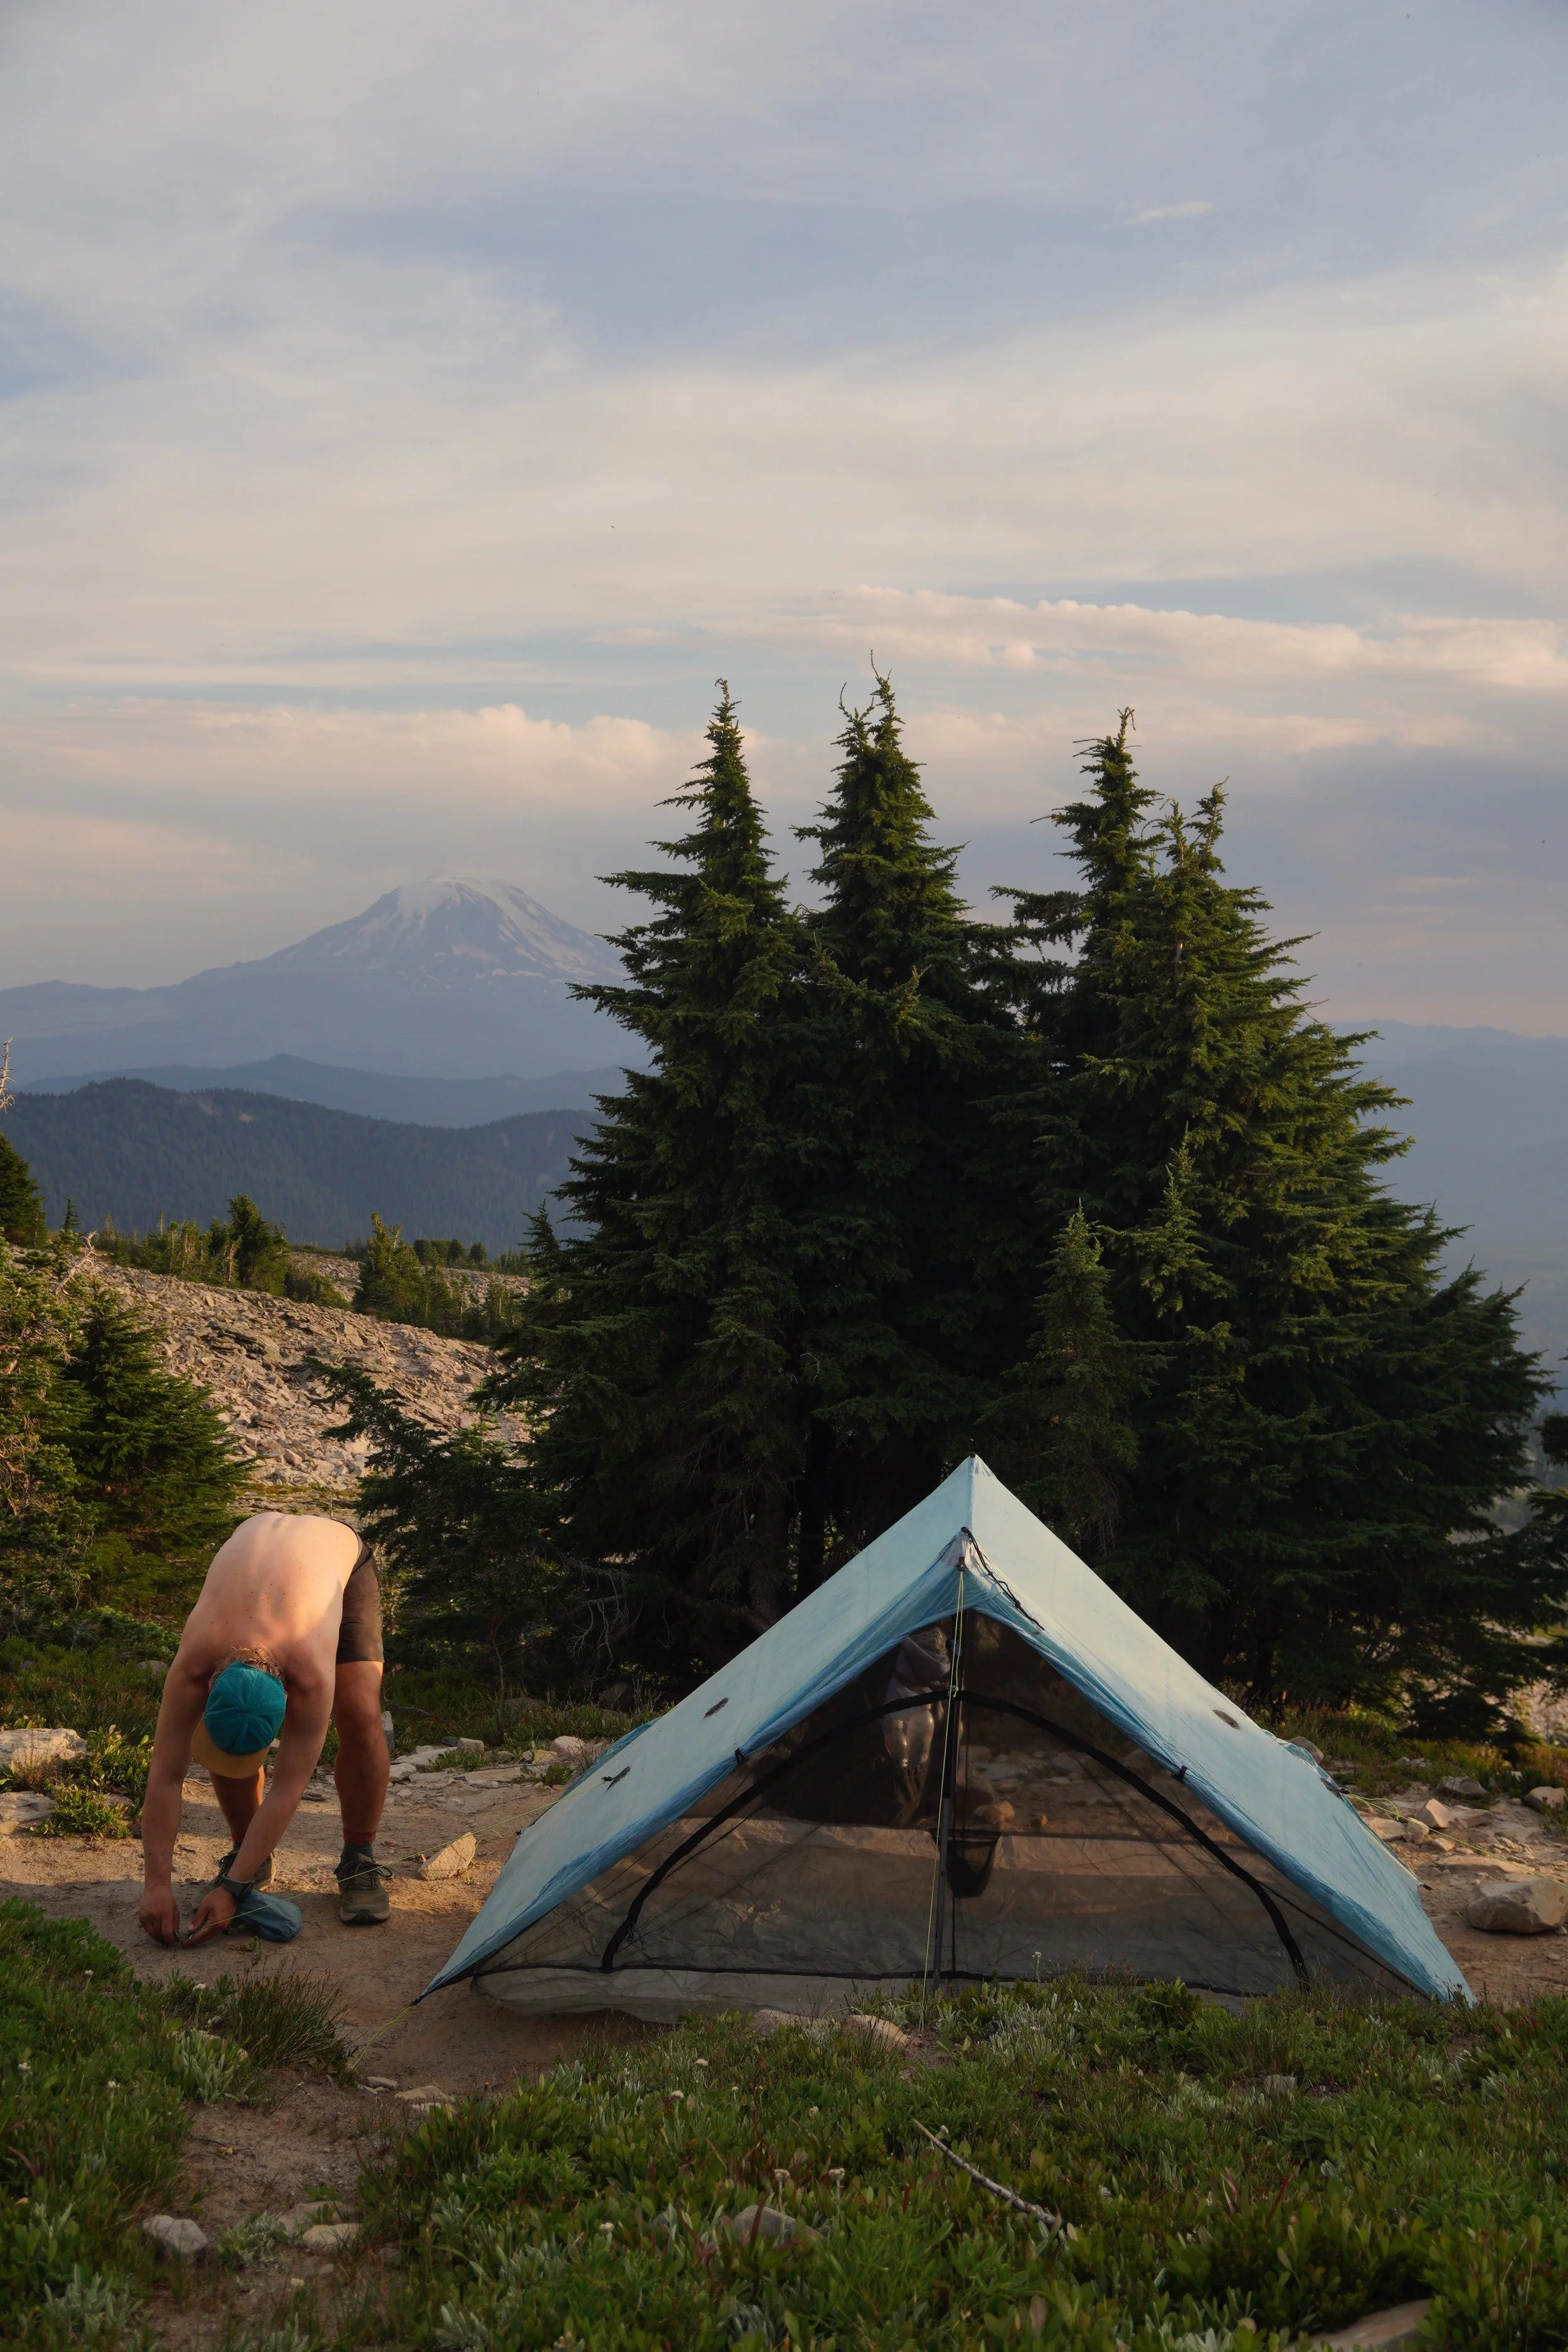
Tent
Our tent is a ZPacks Duplex, and I am quite sure we will not change it soon. It is a 3-seasons non-freestanding tent with a very minimalistic design, ultralight and easy to set up. When properly pitched, it is well ventilated, resistant in bad weather, and quite roomy (especially when used by one person only).
In my opinion, there are only three possible complications related to this tent:
It is not optimal in extremely windy conditions. In such situations, we advise to properly orient it with the direction of the wind, to anchor it well to the ground using big rocks, and to pull all the lines as much as you can to create tension.
It is more difficult to pitch if the therrain is very rocky. In such cases, you could use rocks and trees to tighten the lines and to anchor the tent to the ground.
It is not a very warm tent, as it is a light 3-seasons shelter. We would therefore recommend other tents when hiking in cold and windy conditions.
⛺️ Freestanding vs non-freestanding:
The difference between these two tent types is that a freestanding can stand by itself, while a non-freestanding can’t (wow, shocker).
Non-freestanding tent: you’ll need one or two trekking poles to pitch it, depending on the model. It is usually anchored to the ground with pegs, and relies on tension in order to stand. Since it misses the whole “skeleton” (the metal frame used to keep it up), it is much lighter and smaller to pack than a freestanding tent.
Freestanding tent: this is the classical type of tent, which uses a metal frame to stand and doesn’t need to be completely fixed to the ground. It is therefore easier to move around at the campsite and to clean its inside (you can simply lift it up and scroll it), but it is much heavier and bulkier than a non-freestanding tent.
🤐 Zipper Advice:
Chef and I are using our ZPacks Duplex since years. It survived many cold, windy and rainy nights… it even survived the PCT without any big issue, and we survived in it as a couple.
The only issue our tent (and many other tents from various brands) had on the PCT was the failure of the zippers.
We found out that the problem is not with the zipper itself, but rather with the zipper-slider that gets worn out due to dust, sand and dirt. It is very easy to replace it in ZPacks tents, and we highly recommend to bring two extra sliders with you, so you can repair it directly on the field!
💨 Other tents for other trails:
We also have two other tents: a Big Agnes Tiger Wall and a Fjällräven Abisko Lite.
The Big Agnes is a 3-seasons freestanding tent. It was actually used by Pacman on the PCT, and he liked it a lot! We still have to try it out… and I honestly can’t wait to pitch it without the rainfly and fall asleep in it while gazing at the stars.
The Fjällräven is a 4-seasons freestanding tent with a tunnel shape. It is heavier, but much warmer and more resistant against strong winds. We already used it in Iceland, and we loved it!

Quilt
You’ll notice that I use a quilt instead of a classical sleeping bag… I actually switched to a quilt while hiking the PCT, as I wanted to reduce my base weight and was curious to try one out. And god, it was the best decision ever! I am simply in love with my warm, cozy and fluffy Katabatic Flex 15°F quilt.
🪶 Quilt vs sleeping bag:
I am sure everybody knows how a classical mummy sleeping bag looks like. Well, quilts are basically half a sleeping bag, and look like a blanket. They are usually lighter than sleeping bags, and provide more freedom for your legs to move.
FAQ #1: “Isn’t your back getting cold at night?!”. No, because your sleeping pad will anyway provide the needed insulation. Even when sleeping in a mummy bag, the feathers below your back are getting compressed and do not provide any warmth to your body.
FAQ #2: “What about your feet and the sides of your body?”. Quilts usually have a foot box to provide more warmth to the feet. Depending on the model, it sometimes can be opened completely. Moreover, straps can be used to tighten the quilt to the sleeping pad, preventing cold air to come through the sides.
Sleeping Pad
My choice of sleeping pads might be a bit confusing at first, but trust me, there is a reason why I list both an inflatable (Thermarest NeoAir Xlite NXT) and a foldable (Thermarest Zlite Sol) sleeping pad.
I am a “side sleeper”. That’s why I like to sleep on an inflatable pad. However, one of my worst nightmares is to wake up in the middle of the night on a deflated pad. Both Chef and I know the struggle… we had to patch so many holes and went through so many existential crises. I therefore ended up buying a foldable pad to place underneath my inflatable one and protect it from pointy rocks and sticks. This foldable pad has also proven to be a very comfortable and luxurious companion during breaks!
❓ Tell me your strategy:
I would like to find a better solution, and these are the two options I am considering:
1 - Get used to sleep on the foldable pad only.
2 - Replace the foldable pad with a lighter and cheaper option, like a thin yoga mat.Please, I need your help… use the Trail Chat and let me know about your sleeping pad strategy!
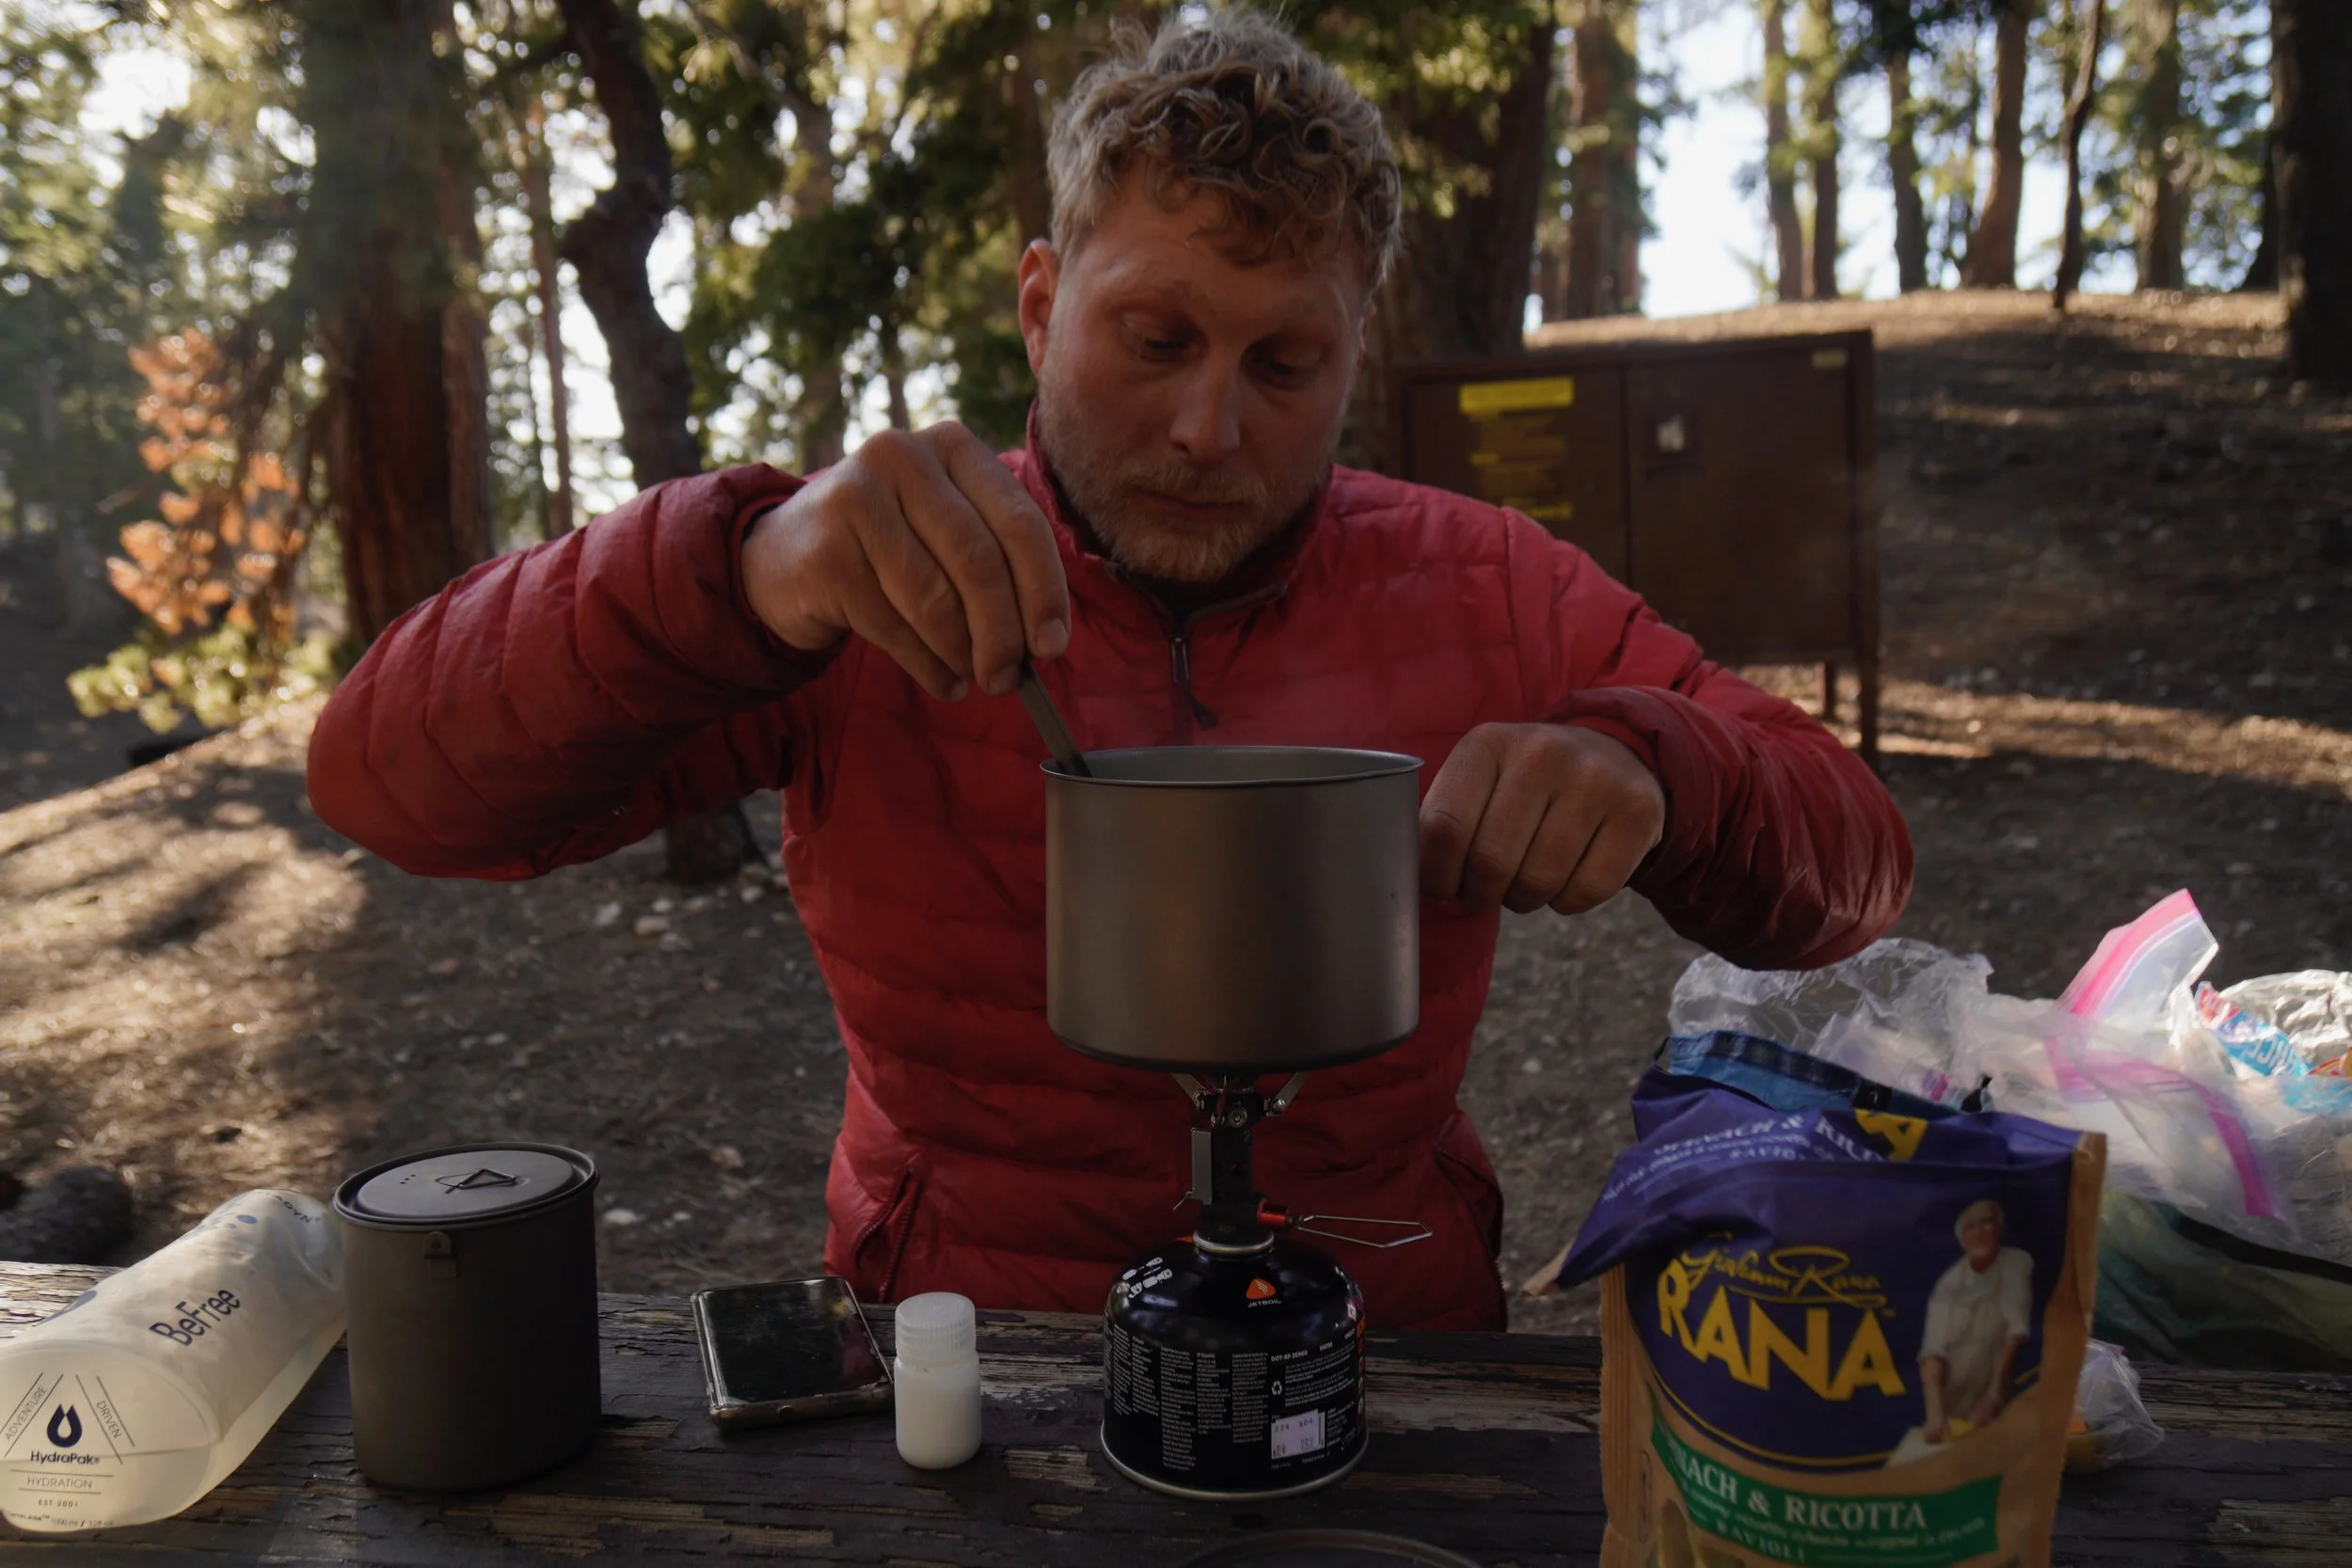
Pot & Stove
When hiking together, Chef and I usualy share some gear to save weight… we only carry one stove and one fuel can for both of us.
The MSR PocketRocket Deluxe is the stove we share. It is a good stove… lightweight, powerful, small and compact.
Each of us has his own pot. I use a Toaks Titanium 750 mL, which in my opinion is the best size and volume for one person. However, Chef likes to cook for both of us, so he has a “monster size pot”, the Toaks Titanium 1350 mL.
🍜 Stove vs coald soaking:
Can you survive without a warm meal at the end of a long hiking day?
We simply can’t… cooking and enjoying a warm pot of noodles in the evening is vital for us on the trail. That’s why we carry the stove. However, if you’re up for the challenge, you could join the “cold soaking movement” and save some weight! You would only need to carry a pot with a lid that can be closed, to let your food soak in water while you’re hiking… an empty Talenti jar would do just fine :)
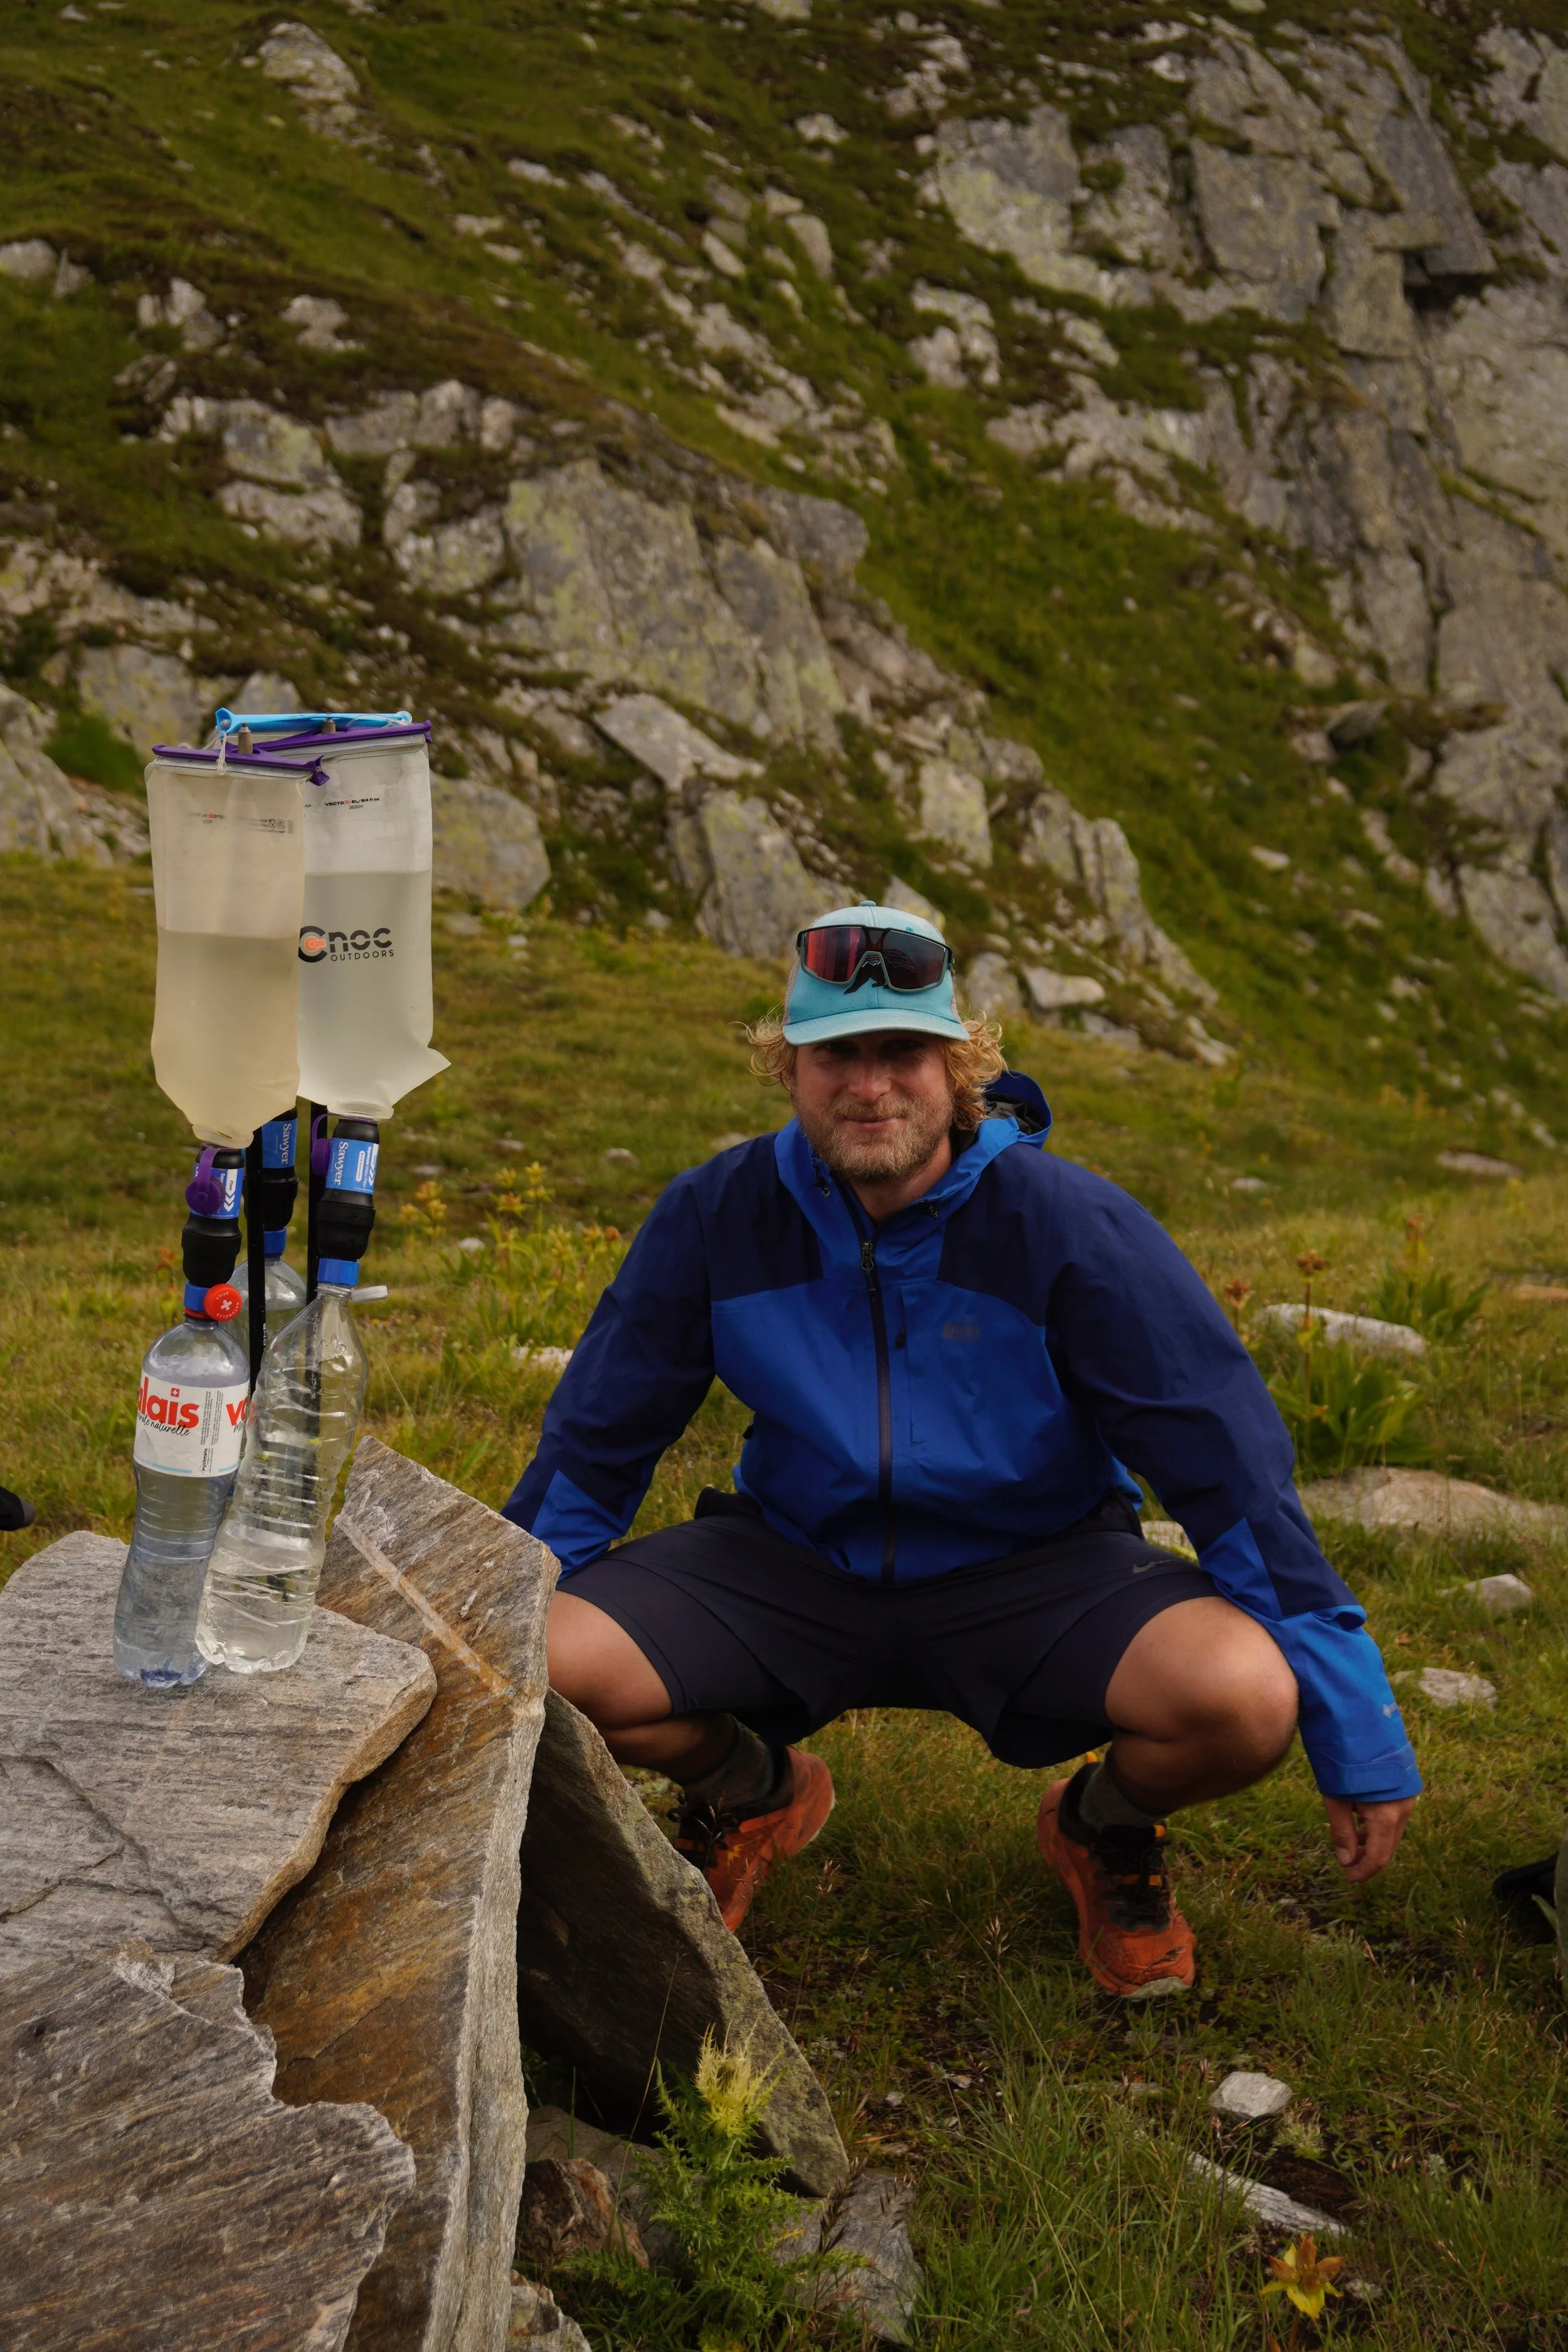
Water Filter
We tried different brands and models over the last few years, but nothing — I repeat, nothing — beats the Sawyer Squeeze!
💧 Gravity is a real game changer:
The different filters we used in the past (Katadyn BeFree, Sawyer Mini, Sawyer Micro) were filtering water at a much slower rate and were more difficult to unclog when compared to the Sawyer Squeeze model. Moreover, they all required manual squeezing for filtration to happen, while the Sawyer Squeeze can also function with gravity!
And trust me, there is nothing better to get to camp in the evening, hang the filtration system, and let gravity do the job for you while you pitch your tent.
Shoes
I wear Hokas Speedgoat, while Chef wears Topos Pursuit. Both of us usually change to a new pair of shoes every 450 miles, to avoid foot injuries as the cushioning gets consumed.
👣 Shoe advice:
Find a comfortable brand and model, get used to it and make sure to break in the shoes before hitting the trail! Moreover, to avoid injuries, we recommend to stick to your favorite brand and model for the entire thru-hike.
🥾 Boots:
Sometimes it might be wiser to wear mountain boots, depending on the terrain of the specific trail you’re going to hike. I own a pair of Lowa Mauria boots. Although I got used to hiking in comfy trail runners on the PCT, I would still choose boots if the trail is very wet and muddy, or in case of technical alpine terrain.

GPS
When hitting a trail, whether in a remote region or close to civilization, I think it is always very important to carry a GPS device.
I have a Garmin InReach Explorer+ strapped to my backpack at all times. I chose a monthly billing plan, which can be activated during the months I am on trail and paused when I’m not hiking. This GPS is my trusted companion for:
Communication: even when there is no phone reception, I can communicate via SMS with family and friends at home, to let them know how I’m doing and share my location. It is also possible to communicate with other hikers who own a Garmin GPS!
Navigation: the bigger screen of the Explorer+ can be used to visualize maps and navigate on trail. I usually upload a gpx file of the trail I am going to hike, and use it only in case I’m lost, or in case I want to save battery on my phone.
Backup: I think it is very important to have a backup for navigation and communication, in case your phone decides to die out there.
SOS: the device has a button which can be pushed in dangerous situations. The local authorities will be informed about your exact location, and rescue will be on its way.
🗺️ Explorer+ vs mini:
If you decide to purchase the Garmin InReach Mini to save some weight, the navigation is the only functionality that can’t be used, because of the little screen of the device.
That’s a wrap!
If you have any comment or suggestion, let us know through the Trail Chat. We’ll be happy to answer… we always love talking about gear :)

Want to read more about Gear?